Índice
-
1. Tackle Your Essential Settings First
-
2. Add Only Your Most Popular Items First
-
3. Create One Simple Project Right Away
-
4. Focus on Upcoming Projects, Not History
-
5. Use Our Professional Inventory Setup Service
-
6. Leverage Package Templates for Complex Items
-
7. Embrace "Done Is Better Than Perfect"
You’ve signed up for Goodshuffle Pro, and now you’re staring at a blank dashboard wondering, “Where do I even start?”
We get it. You have events to run, clients to please, and approximately zero time to spend configuring new software. The good news? You don’t need to build your entire business in Goodshuffle Pro on day one.
Here are 7 tips from our team on how to get up and running quickly so you can start seeing value right away.
(es-419) Español de América Latina1. Tackle Your Essential Settings First
For the fastest start, configure these key settings. Down the line, as you’re creating projects and adding inventory, you’ll move faster if these are pre-configured:
Business Settings (15-20 minutes)
Add your company logo and colors during the initial setup process. Then, it’s time to enter your terms and conditions and configure your payment policies. If you already have terms and conditions stored in a document, great — just upload the document and our system will automatically extract the text for you to review.
Tax Configuration (10 minutes)
First, you’ll need to determine if you’re origin-based (charge tax based on warehouse location) or destination-based (charge tax based on venue location). Check with a tax professional if you’re unsure, but here’s a handy starter guide on sales tax rates.
Now let’s get your taxes set up by location.
Team Settings (5 minutes)
Add your team members with appropriate permissions, based on whether they’re a full user (like a salesperson, bookkeeper, or office staff), limited user (warehouse team, drivers, installers), or a read-only user (DJs or contractors).
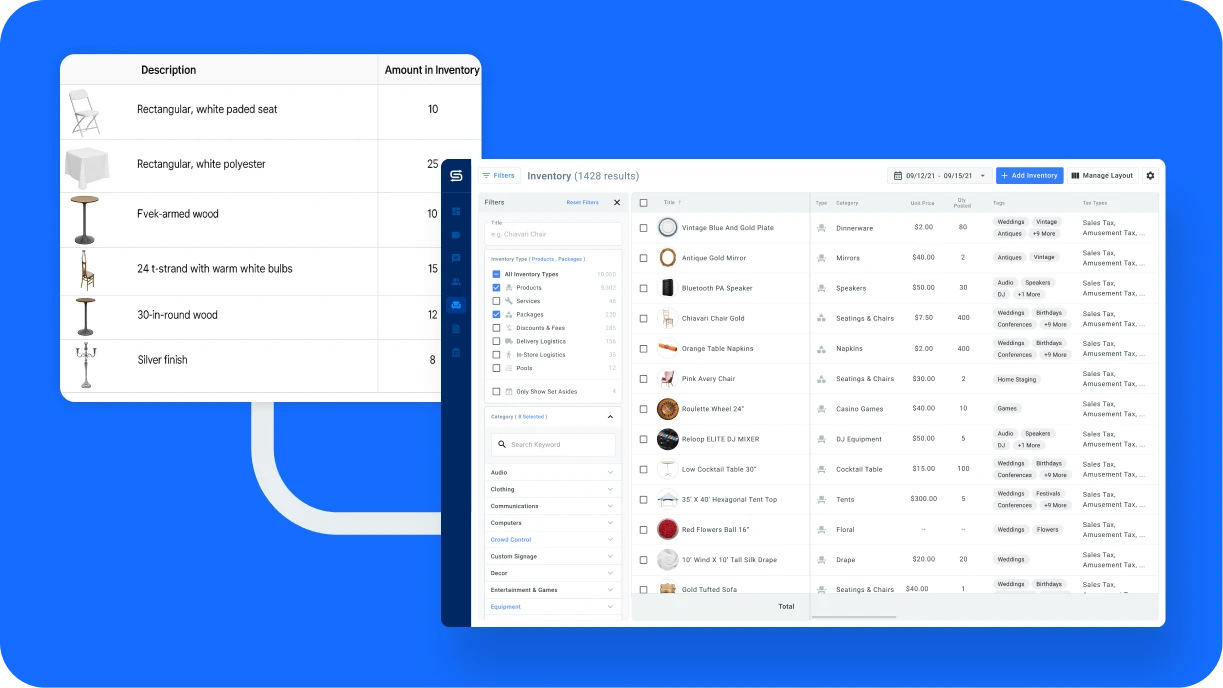
(es-419) Español de América Latina2. Add Only Your Most Popular Items First
Don’t migrate your entire inventory immediately. Start with your top 20% of items that generate 80% of your revenue. As you bring projects over from your previous system, you can continue adding inventory as needed.
Onboarding Specialist @ GoodshuffleSamantha-Smith-1
"Enter only your most popular items first! As you bring your projects over from your previous platform, you can add the rest as you go."

Samantha Smith
3. Create One Simple Project Right Away
Even before your inventory is complete, create a single project to experience the full workflow.
“I recommend adding a single item to inventory and then creating a project to send yourself with only that item,” says Nick Loveday, our Associate Onboarding Specialist. “This gives you a feel for how the system works from start to finish.”
This approach lets you experience the full client-facing process — from quotes to signatures to payment — without waiting until your entire catalog is built.
Check out this 1-minute video on how to create your first project👇
(es-419) Español de América Latina4. Focus on Upcoming Projects, Not History
Rather than backfilling historical data, prioritize projects that are actually coming up. This gives you an immediate return on your time investment.
- Add inventory for immediate upcoming events first
- Create projects for events happening in the next 30 days
- Only backfill historical data later, if necessary
Here’s a 1-minute video that explains more 👇
(es-419) Español de América Latina5. Use Our Professional Inventory Setup Service
Here’s the game-changer many new users don’t know about: You don’t have to enter all your inventory yourself.
- Annual subscribers: We’ll upload your inventory completely free
- Monthly subscribers: We offer custom inventory setup packages at competitive rates
This service alone can save you dozens of hours and eliminate the most tedious part of getting started. Simply provide your inventory list in a spreadsheet format, and our team will handle the rest.
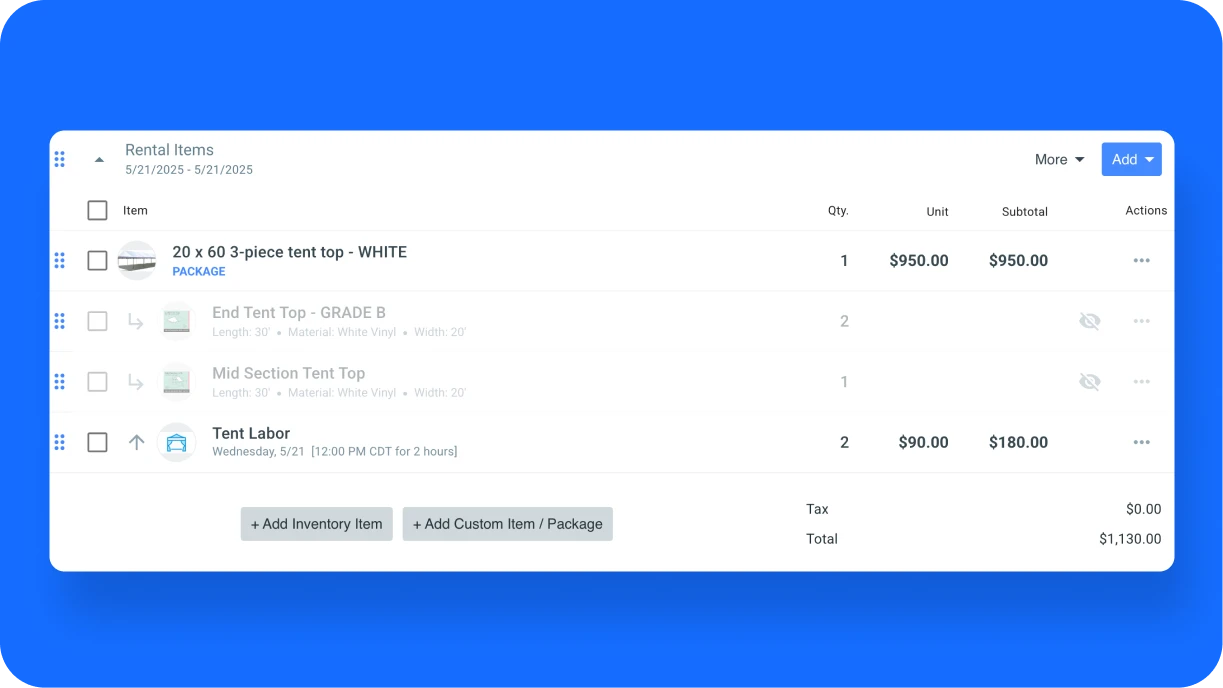
6. Leverage Package Templates for Complex Items
For rental items that come in multiple sizes or configurations, use the package feature to save hours of repetitive setup.
Dominique Cheek, another Onboarding Specialist, shares this tip: “I’ve seen package templates help so many businesses with things like tents and dance floors. After all your basic items are in, make a package with all the potential pieces you’ll need. Then use the duplicate feature and build your items starting from your smallest configuration, adjusting the quantity of contents as you scale up in size.”
This works perfectly for tent packages, dance floors, lounge groupings, and sound systems where you offer multiple size configurations.
7. Embrace "Done Is Better Than Perfect"
Some new Goodshuffle Pro users get stuck trying to perfect every aspect of their setup. But you can always refine things later — the important thing is to start using the system for actual business as quickly as possible.
Start with just one item and one project today. You’ll be surprised how quickly you can build from there!
Access our resources, including training videos, educational articles, and our Help Center.Explore Our User Hub

Compartir en